SVG Track – Basic Lines
- June 18th, 2012
This week, the SVG Track got off to a great start – we updated our Workspace to reflect our full schedule that maps our present curriculum to effective production of the images in the CCR. Each week we will focus on a new feature of Inkscape with some overlap between the image groups. The goal is to provide practical work experience with a focus on learning the tools in the program. This week, we started simple – creating a set of basic line diagrams. At #rdcHQ, we like to think of it as practicing our scales:
Tutorial: Interpolate + Exclusion
While the SVG Team is warming up, we are preparing a set of tutorials for more advanced illustrations on the horizon.
Our next batch of illustrations will use a combination of features in Inkscape to create uniform grids for tables as well as patterns for modeling images through a technique generally referred to as “cross-hatching.” We covered the first step in this technique with a function called Interpolate. → You can review that tutorial here.
When used in combination with the Exclusion command, Interpolate is a very powerful production tool. There are several steps involved in this process, and when executed in the proper sequence, the commands reproduce the functionality of Adobe Illustrator’s excellent Pathfinder tool (in this particular instance, the Exclude function). We discovered this technique after considerable research which led to the conclusion that this particular function was not currently possible in Inkscape (as a matter of fact, we were convinced this was the case at the close of the 2011 season). Most professionals agree that although Inkscape is wonderful, there are some things it can not do. We are always happy to provide evidence to the contrary!
The following steps will invoke Inkscape’s Exclusion command on a series of lines -
#rdcHQ Will be upgrading all of our previous tutorial videos to Vimeo … stay tuned!
1. Interpolate the lines.
2. Ungroup the Interpolated lines. <-- important!
3. Group Select the individual segments and “Stroke to Path” <-- important!
4. Draw the desired shape above the resulting line pattern.
5. FILL the shape with a color (DO NOT stroke the shape) <-- important!
6. Group Select the shape with the individual line segments.
7. Select Exclusion from the Path menu.
8. Select Break Apart from the Path menu. This will result in segments inside and outside the filled shape.
9. Delete the segments that fall outside of the filled shape.
10. Voila! <-- watch video below to review steps 1 through 9!
Granted this is several more steps than is necessary using Adobe Illustrator’s Blend and Pathfinder tool (the primary difference being the need to stroke the paths and fill the shape before excluding) – but the results are the same and the tools are 100% Open Source!
 Phineas studies the MathML and SVG spec in preparation for deBUG Days 2012


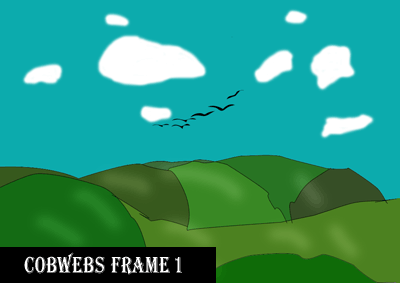 We’ll be tracking the progress of Cobwebs frame-by-frame at #rdcHQ … Stay Tuned!
 illustration:


